Showing posts with label Crafts. Show all posts

Monday, November 7, 2011

52 Weeks of Mail

My friend Molly Lee, pop-up card genius and paper artist, clued me into the Etsy sponsored 52 weeks of Mail project by sending me a glittery bike girl card.  I've been wanting to commit to something like this, so it gave me a nudge to rediscover the art of written correspondence on actual paper.

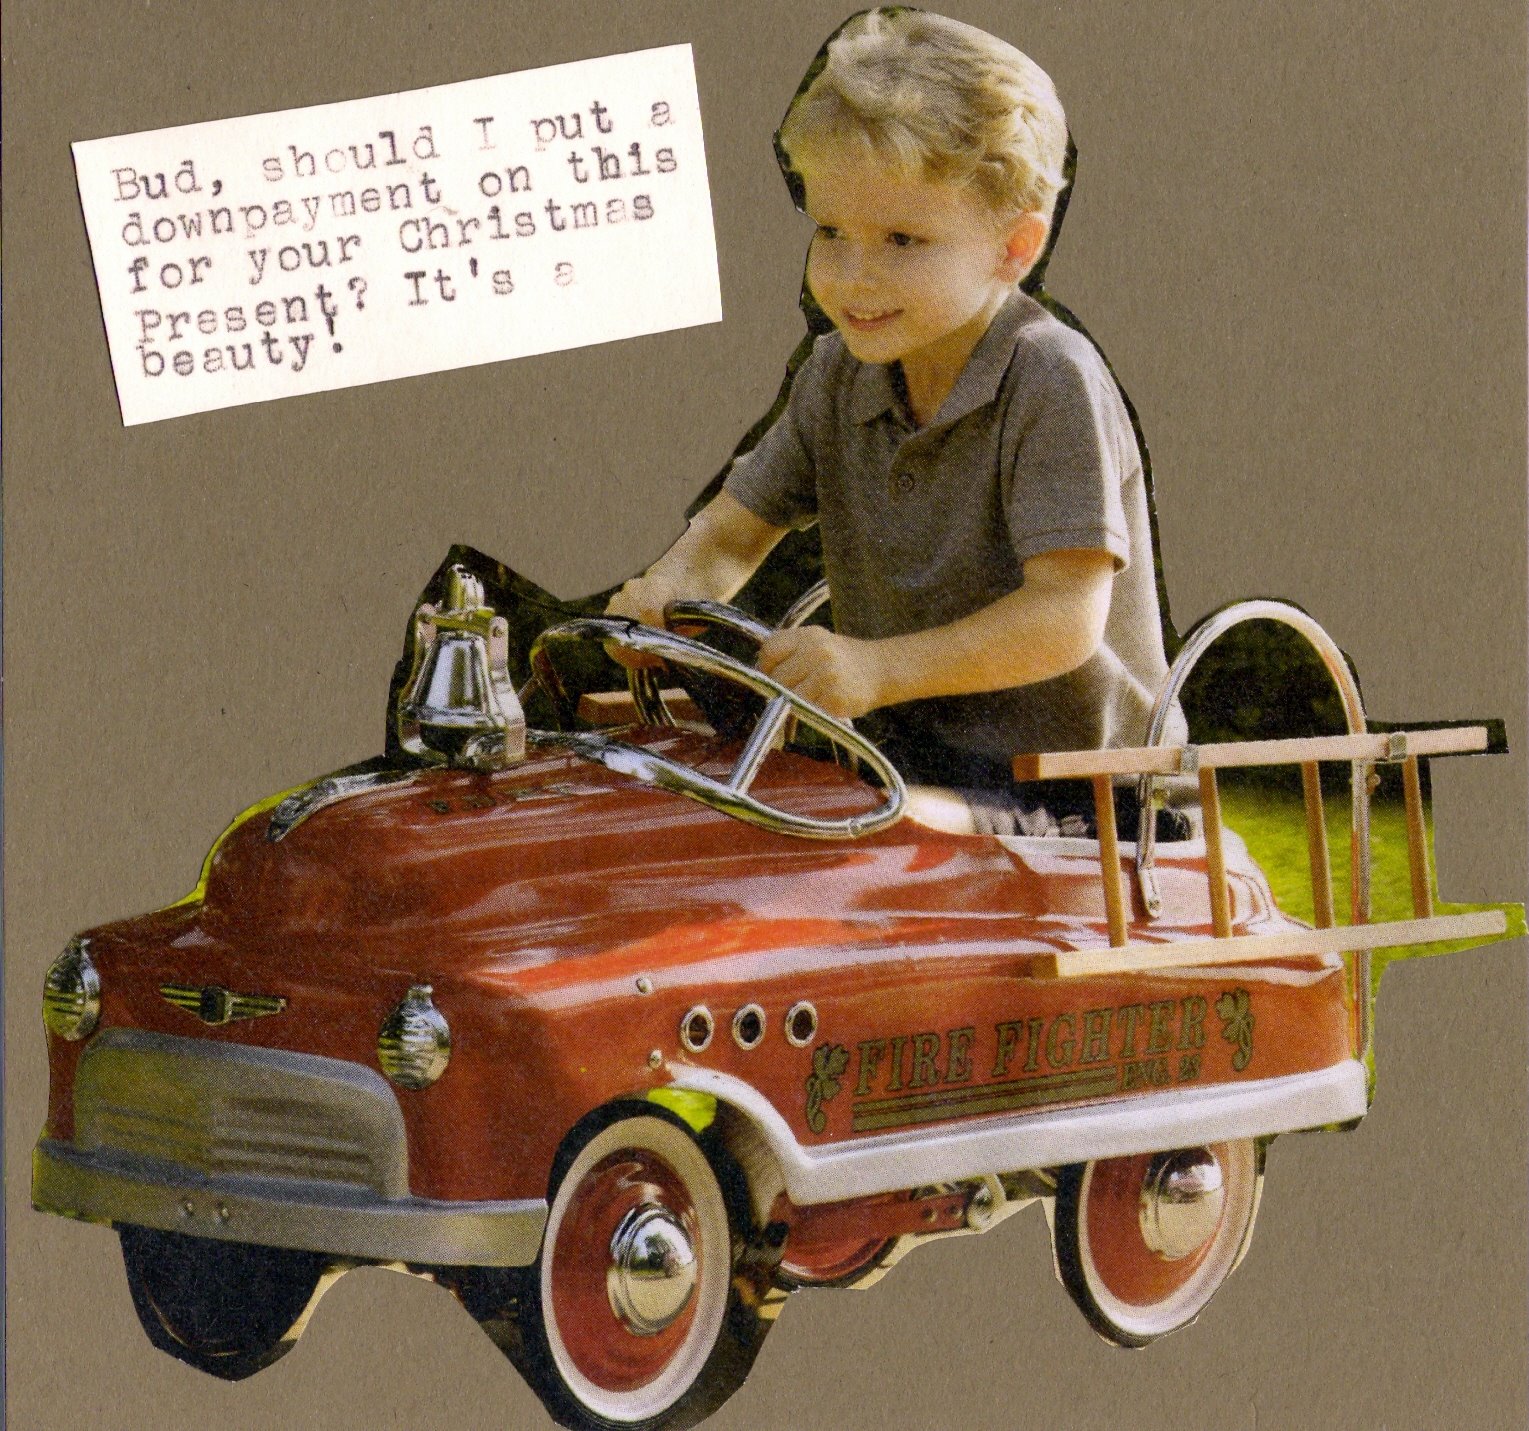
My first piece is a card for my father-in-law Al Drake of Flatout Press.  He loves the anything to do with the fiftties and hot rods and has written several books on the subject. In fact, he still uses a manual typewriter. I thought this was a fitting start since he still corresponds with friends and businesses alike via mail and his trusty Olivetti.

I was inspired to dust off my old $5 flea market typewriter. I wrote my first term paper on it in High School: A Coming of Age analysis of To Kill a Mockingbird, A Separate Peace, Catcher in the Rye, and Member of  the Wedding.  I'm happy to say that here in Portland you can still buy ribbons and have your typewriter serviced and repaired at Ace Typewriter!


So consider this a nudge to see if you can still write by hand, lick an envelope, and stick on a stamp.

Monday, April 12, 2010

Blue Plate Special

For some reason, I got it in my head that the Easter bunny should deliver a hearty breakfast instead of chocolate, peeps and jelly beans, so I decided to create some crocheted delights small enough to stuff into plastic eggs.


For the egg, I simply crocheted a round and increased my stitches until it was egg size. I did the yolk the same way, but added a little stuffing before sewing onto the white. I made the bacon crinkly by slipping a stitch instead of single crochet every 5 stitches or so, every other row. To make the coffee cup, I started with a round of 6 stitches and then steadily increased until it was the width that I wanted. I did one row in the front loop only to make the cup go up. I kept going until I got the height. The coffee itself is made the same way as the egg. I use stuffing to make it look like a full cup. The toast is a square with brown stitched around the outside. The butter pat is a square also. Maybe I'll make some orange marmalade next time.

Bon apetit!

Reblog this post [with Zemanta]

Saturday, January 23, 2010

Pop-up Valentine Workshop

How to mend a broken heart? Cut it up and glue it to some cardstock! Join me on Saturday, February 6th from 2 to 4 for my Pop-up Valentine workshop at the Modern Spool studio. Nothing says "Don't you think I'm cool?" like a pop-up work of art. I hope you can join me!

Wednesday, January 6, 2010

New Pair of Glasses


Here's a little paper cut I did just before the new year. I was inspired by a contrasty photograph of a butterfly I found in my uncle's artist morgue. I scanned it into Illustrator, increased the contrast, and printed it out for cutting. I mounted it on some translucent paper from discarded paper samples. I love reusing and recycling when I can. Sometimes beautiful paper comes through our mailboxes and heads straight out to the recycling bin.

I like my butterfly, but I can see some rough places in my cutting. I think of this first try as an experiment. In the process of trying to do this detailed work, I discovered that I need new glasses. I'm looking forward to clear vision and more challenges in 2010!
Reblog this post [with Zemanta]

Thursday, December 3, 2009

when I am among the trees


Birthday card for a friend inspired by a Mary Oliver poem.

When I Am Among the Trees

When I am among the trees,
especially the willows and the honey locust,
equally the beech, the oaks and the pines,
they give off such hints of gladness,
I would almost say that they save me, and daily.

I am so distant from the hope of myself,
in which I have goodness, and discernment,
and never hurry through the world
but walk slowly, and bow often.

Around me the trees stir in their leaves
and call out, "Stay awhile."
The light flows from their branches.

And they call again, "It's simple," they say,
"and you too have come
into the world to do this, to go easy, to be filled
with light, and to shine."

~ Mary Oliver ~

Reblog this post [with Zemanta]

Tuesday, November 24, 2009

The devil made me do it. again.


A simple request: I want to be the "soccer player from hell" for Halloween. I love a costume that comes ready made. Great. You can wear your soccer uniform, but how can we make it hellish. I've got it! A crocheted devil hat. What could be scarier?I had a surplus of red Red Heart yarn, so I was ready to go. I could make a highly washable hat out of an unnatural color of red.

I based my hat on the Viking Hat in my earlier post. The base of the hat is for the most part the Boy Beanie from the Stitch N' Bitch book. (Note: I just discovered that there is an extensive collection of errata for both Stitch N' Bitch books at Knit Happens.) I used the same concept that I used before for the horns, but improved on the idea. The horns for the Viking hat were a kind of cornucopia shape with an open end for stuffing. The stuffing kind of leaked out a bit while I was stitching up the hat so I thought I might make life a bit easier on myself by making a completely closed stuffed horn.

I started out by making a Magic Ring. This circular start can be completely cinched up so that you don't get the hole that you see in a crocheted flower or Granny Square. I cast on about 5 stitches in single crochet, slipped the first stitch and then increased in every stitch all the way around. The following row I crocheted in the front loop only, to make the piece go in a vertical direction. To make the horn shape, I decreased at the first and last stitches in the round every other row. You might have to adjust to make a longer or shorter horn. For example, you could crochet 2 rows between decreases. When the horn started getting really small, I put in the stuffing. In a couple more rounds I slipped the yarn through the remaining few stitches and fastened off. I attached the horns to the beanie and my hat from hell was complete!
Reblog this post [with Zemanta]

Sunday, October 25, 2009

Sunflower Surprise

I think this is the most grannyish project I've ever done, but I'm not afraid to push the envelope. I find a certain freedom in crocheting in both the avant-garde and the traditional style. I've learned a lot from months of sunflowers which I will apply to my other projects.

It all started when my mom decided that we should have a family crochet group. We would get together once a month and work on afghans, help each other, and have some girl time. Mom dragged out the Herrschner's catalog (where you buy the pattern and all the yarn in one go). The only one I could get my head around, was the Sunflower Afghan. Everything else seemed to have dizzying stripes or chevrons. Still new to crochet, I figured I could learn whatever I need with the proper motivation. Besides, the kit seemed pretty affordable. If I really screwed it up, the price wouldn't be too high. (We will not speak of the alpaca sweater that I never finished. $200 worth of yarn.)

When the kit arrived, I was disappointed. The catalog pictured a beautiful sunlight afghan of warm greens and golds, but the yarn I got was more of a mint color. What was supposed to be tan and green, turned out to be tan and white. Gold was dark orange and Dark Orange was more of a neon orange. The yarn was synthetic, so I knew what I was getting into, but I didn't expect all the knots and breaks in the skeins. Herschner's sent the wrong afghan to my mom, so she went through the headache of having to return it and wait for the right one. You get what you pay for. To be fair, she did have a very positive experience with her second project, the Navajo Afghan and my sisters' kits turned out to be great beginner's projects.

In spite of my complaints I did enjoy making this afghan. I learned about crocheting circular flowers and squaring them off, picot stitches, triple clusters, and reading a crochet pattern. While the colors weren't what I was expecting, I was surprised to see how well it turned out. I guess I got in touch with my inner granny. I'm okay with that!


Reblog this post [with Zemanta]

Friday, March 27, 2009

The devil made me do it...


I did not set out to make a gonzo-like creature, but the inner muppet in me emerged when I tried to crochet the devil in the book Creepy Cute Crochet by Christina Haden. Her book is full of ninjas, office zombies, evil monkeys and even a Xena warrior princess look alike. They are all based on a two part head/body pattern, with myriad variations. I did achieve the basic body structure, but when it came down to embellishments, I had to go my own way. She uses a lot of felt cut outs for decorations and accessories. I'm more of a purist at the moment, wanting to fashion any facial characteristics or accoutrements with yarn. I tried not to stray from the path.....
Reblog this post [with Zemanta]

Friday, January 16, 2009

Crocheting outside the box


Don't ask me why. I don't know why. I tend to get a bit obsessive about my crafting. I start seeing crochet possibilities everywhere. What kind of materials can I crochet with? Wire? Dental Floss? Rags? Plastic? And apparently, pasta. I also start brainstorming on my subject matter. I could create crocheted sushi, articles of everyday life like telephones, computers, teapots, people animals, tubes of toothpaste. I've been a knitter for many years, but I'm finding the flexibility of crochet design fascinating. I never thought of it as an art form before. Let's come up with a name for ourselves to honor the artistry of the craft: Crochettiste. Fiber Engineer. Yarn Wrangler. Yarn Sculptor. Mixed Media Twister. Let me know if you have any ideas of your own!
Reblog this post [with Zemanta]

Monday, December 15, 2008

The Crafternoon: An afternoon of teaching and sharing craft ideas


I recently held a Crafternoon at my house to make cards and wrapping paper for the holidays. We had three 12 year old girls, one 8 year old boy and two grown-ups. Here are some tips I followed to make it a success. (I also learned a few on the way.):

Keep it simple

It’s best to have one or two activities and maybe a 3rd one for a backup. That way you can really focus on the project at hand; discover its pitfalls and possibilities. I think it’s better to spend more time on a quality product than spread yourselves thin on several activities. Think success. At the end of our afternoon, everyone walked away with beautiful greeting cards and wrapping paper.

In terms of the projects themselves, you want to keep it simple. For the cards, we focused on collage. I had magazine cuttings, ribbons, feathers to put on the cards. I also had some holiday rubber stamps, crazy scissors and glue. The kids started on their cards right away. As they progressed, they started sharing ideas and materials. When the action started to slow down, I added a few pointers. I showed the girls how to make a fairly simple pop-up card and they used the basic ideas to create their collages in 3-D.

For our second activity, we put butcher paper on the floor and had the kids use stamps and pens to make wrapping paper. We could use some of the same materials for this project, including the magazines for collage.

Know your audience

The Crafternoon can take many forms depending on the skill level of the crafters. The cards and wrapping paper could be done with very young children. Projects that involve glue guns, tools, exacto knives would be more appropriate for an older crowd. Crafternoons don’t have to be for kids--a grown-up crafting event could be just what the doctor ordered!

Know your subject

Doing a craft and teaching a craft are two different things. I find it’s better to teach something I know really well, as I have had a chance to make LOTS of mistakes and find the pitfalls at each stage of the project. I usually spend some time doing the project and thinking it out step by step as I go. I might also include examples of various stages of the craft. For example, in teaching how to make gift bags, I have a bag before it’s glued, another with the sides only glued and then a completed bag. It’s important for me to show how I got there. A little rehearsal can go a long way when you are teaching a craft.

One point I missed in my last Crafternoon, was making sure that people knew how to use the materials. For the kids, safety may be involved. How do you use the paper cutter or wield the exacto knife? How do take care of the stamp pads or the paper crimper? You also need to include the expectations you have for the use of materials or equipment , such as: “We only use the red scissors for fabric. All the other scissors can be used for paper.”

Be prepared

For my Crafternoon, I set out my grandmother’s dining room table with all the leaves extended to create a spacious work area. Since we were going to be gluing and stamping, I put down vinyl tablecloths. I set up a couple of stations of materials which included scissors, rulers, glue, pens, hole punches. I tried to spread out the collages materials to keep them accessible. This keeps passing back and forth and reaching over each other’s projects to a minimum.

Having done a lot of paper crafts, I know how many scraps can get thrown around in the process of a project. I had three bins ready : recycling, reusable scraps, and garbage.

Don’t forget to plan for the occasional emergency. I put down the vinyl tablecloth for the cards, but if we had been using paint, I might have to protect the floor also. You’ll be more relaxed for the whole experience if you cover your bases.

Clean up

Definitely plan some time for clean-up. It will be easier if you do some clean-up between projects rather than wait until the end. If you’ve done a good job preparing it will be easier to rein it all in. I had bins for scissors, glue, and rulers set up on the table so that the items had a home at the end of the day. For kids, it’s a good time to review taking care of your materials. Put the caps on the glue sticks, put the lids on the stamp pads, etc.

Also, to prepare crafts to be taken home, you might need bags, boxes, or envelopes on hand. I had the kids put their names on big envelopes to take their cards home in. I also had rubber bands at the ready for securing the rolled up wrapping paper.

Have fun

If you’ve done all your homework, it should be a very successful Crafternoon! Play some music, have some simple snacks available, take time to admire each other’s work. Have a show-and-tell after everything is cleaned up.

Plan for next time

The joy of the Crafternoon is sharing ideas and getting new ones. Have someone different host the crafter noon each time, so that everyone can benefit from new ideas. You could do a “Craft-of the Month Club” . and rotate hosting. You’ll add some tools to your bag of tricks and spark new ideas in everyone. I don’t think you’ll run out of things to do…
Reblog this post [with Zemanta]

Tuesday, November 25, 2008

Amigurumi Super Cute


The other day I went to Twisted on Broadway to take a class in Amigurumi, the art of crocheting super cute characters. (Also the name of the book we used). The instructions in our book were in Japanese, but the patterns were so visually oriented that it was easy to figure out what to do. Great for those who absorb information in that way.

It's all done with single crochet, decreases and increases. Once you learn the basic design, it's easy to branch out and come up with your own ideas. There is no limit to the acute cuteness you can achieve!


Reblog this post [with Zemanta]